Disasters happen. As professional in IT you prepare for them to happen. You built your systems with redundant components such as power supplies and enterprise grade SAS disks using hardware RAID. You also make use of file systems that promise to survive a disaster, such as the Resilient FIle System (ReFS) which Microsoft introduced with Windows Server 2012. This is a story about a case where all measures failed, data was considered lost, and an unknown utility called ReFSutil.
Our HPE ProLiant servers were running Windows Server, version 1709. The systems where equipped with a HPE Smart Array RAID controller and a logical drive was created using advanced hardware RAID 6. We built a 100 TB ReFS volume to store backup archives on disk. The system was running fine and all drives were spinning for some time when disaster struck. For some reason the system failed at some point at the beginnen of 2018. Multiple uncorrectable disk errors were reported. The ReFS volume turned up as RAW and access to the data was impossible. The RAID 6 volume was unable to recover the corrupted blocks, probably caused by undetected bit rot.
First of all you do not expect things like this to happen while you are using enterprise grade RAID controllers, SAS drives, and an advanced RAID 6 volume which provides protection against failure of 2 drives simultaneously. Secondly the Resilient File System was apparently not resistant to this kind of failure (maybe not so Resilient after all?). But although the volume was beyond repair, our main concern was if the data was still recoverable.
We searched the internet and found a number of utilities which claimed to have support for ReFS. We also contacted Microsoft Support for any advice on ReFS volume recovery. And we were lucky! We came in contact with a support engineer named Andres. He pointed us on the tools we already found but he also mentioned an utility called ReFSutil which we never heard of and neither did Google / Bing / Duckduckgo. This is also the reason I”m writing this blog even though the story is already almost a year old. There is still no mention of the utility today.
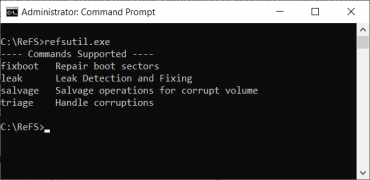
ReFSutil (or ReFSutil.exe) is a built-in utility that comes with all recent Windows installations (Windows Server 1709 and newer, and can also be found in Windows 10). Its in the %SystemRoot%\system32 folder and can be executed without any parameters to display a short introduction.
The command Andres advised us to use was the ‘salvage’ command. The complete output from the salvage command without any parameters is at the end of this blog for reference.
refsutil salvage -QA D: C:\refsutil\working Z:\refsutil\data -x -v
The salvage command is split in two phases. A scan phase and a copy phase. The scan phases tries to find all recoverably files and lists them in an output file. The copy phase uses this file as input and tries to copy the specified files to the destination. The utility can automatically start both phases sequentially but you can also start both phases manually.
In our setup the copy phase of all found files would take a couple of weeks (no joke!) and therefore we aborted it and decided to only recover the most crucial data. By running the phases manually you will be able to verify and modify the output files generated by the scan phase. The output files of the scan files are human readable text files providing the file names and other information about the found files (see example below). Using a text editor we copied only the required file information into a number of new files which we would than use as input files for the copy phase.
By running the copy phase manually, providing it only those entries created from the scan phase which matched the data we would like to recover, we reduced the recovery times to a couple of days. Each file which was recovered was checked for integrity and only one of the recovered files checked out to be corrupt. All other recovered files were just fine! So in the end the built-in ReFSutil tool did what it was supposed to do and only failed to recover one of the files. We recovered about 20 TB of data in total. So please remember this ![]() utility called “refsutil.exe” when you run into trouble with your ReFS volumes! The End.
utility called “refsutil.exe” when you run into trouble with your ReFS volumes! The End.
Picture details
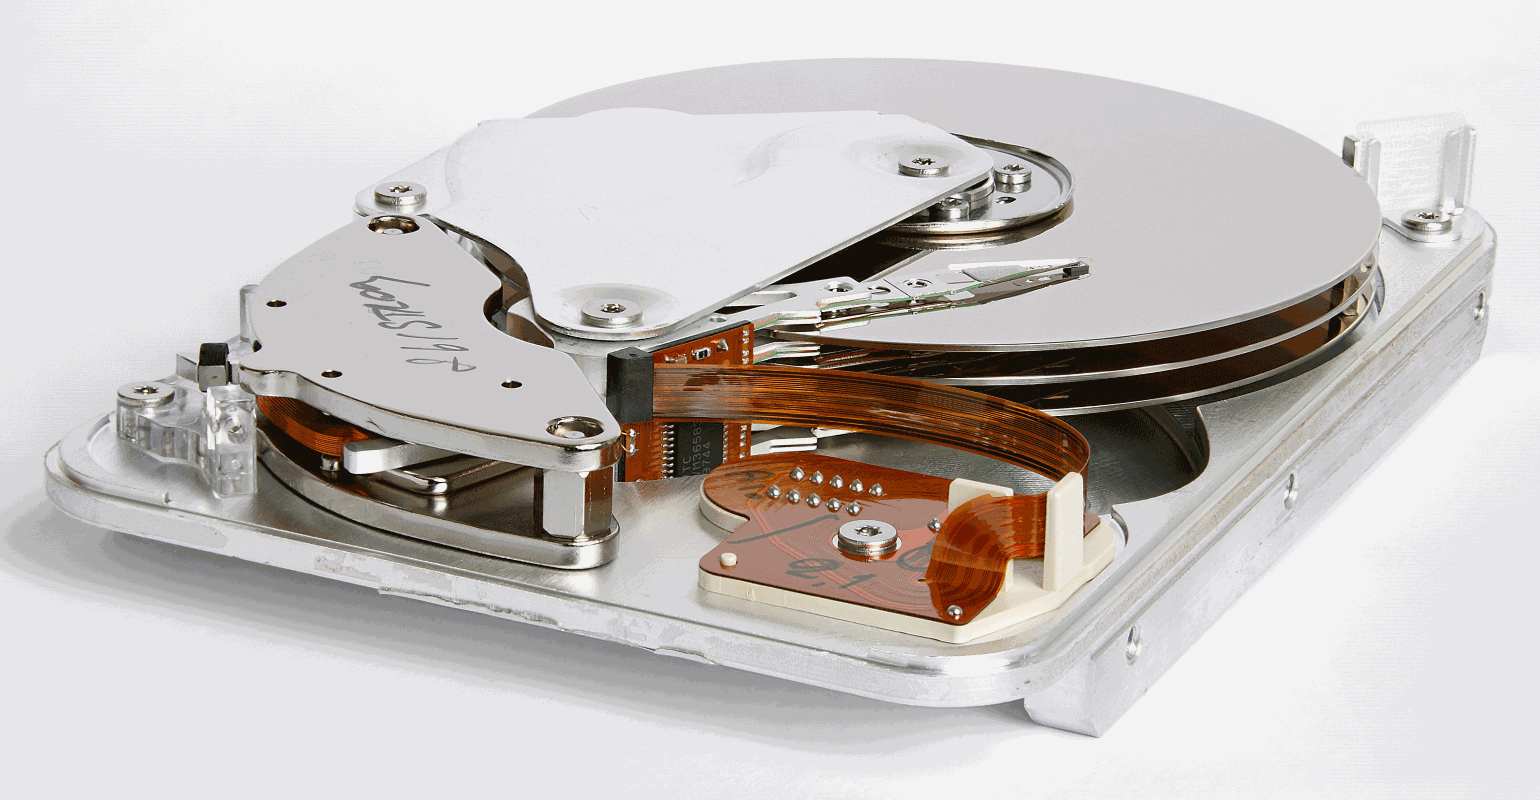
Inner view of a 3.5 inch hard disk drive
Attribution: Eric Gaba, Wikimedia Commons user Sting. This file is licensed under the Creative Commons Attribution-Share Alike 3.0 Unported license. The file has been resized and stored in a lower quality to reduce file size.
Sample output of the scan phase:
Volume Signature: 0xf861a9de

Identified File: \File System Metadata\Reparse Index
Size (0x0 Bytes) Volume Signature: 0xf861a9de Physical LCN: 0x2e00 = <0x12e00, 0x12e01, 0x12e02, 0x12e03> Index = 0x4
Last-Modified: 04/01/2019 10:08:05 PM TableId: 0x520'0 VirtualClock: 0x6 TreeUpdateClock: 0x7

Identified File: \File System Metadata\Security Descriptor Stream
Size (0x0 Bytes) Volume Signature: 0xf861a9de Physical LCN: 0x2e00 = <0x12e00, 0x12e01, 0x12e02, 0x12e03> Index = 0x5
Last-Modified: 04/01/2019 10:08:05 PM TableId: 0x520'0 VirtualClock: 0x6 TreeUpdateClock: 0x7

Identified File: \File System Metadata\Volume Direct IO File
Size (0x0 Bytes) Volume Signature: 0xf861a9de Physical LCN: 0x2e00 = <0x12e00, 0x12e01, 0x12e02, 0x12e03> Index = 0x6
Last-Modified: 04/01/2019 10:08:05 PM TableId: 0x520'0 VirtualClock: 0x6 TreeUpdateClock: 0x7

Identified File: \SomeFolder\SomeFiles\Cloud_Migration_Essentials_E-Book.pdf
Size (0xdd3ee Bytes) Volume Signature: 0xf861a9de Physical LCN: 0x400 = <0x10400, 0x10401, 0x10402, 0x10403> Index = 0x4
Last-Modified: 04/01/2019 10:13:35 PM TableId: 0x705'0 VirtualClock: 0xf TreeUpdateClock: 0x0

Identified File: \SomeFolder\SomeFiles\Enterprise_Cloud_Strategy_2nd_Edition_ebook.pdf
Size (0x7c8138 Bytes) Volume Signature: 0xf861a9de Physical LCN: 0x400 = <0x10400, 0x10401, 0x10402, 0x10403> Index = 0x5
Last-Modified: 04/01/2019 10:12:56 PM TableId: 0x705'0 VirtualClock: 0xf TreeUpdateClock: 0x0

Identified File: \SomeFolder\SomeFiles\Hybrid_Cloud_PerformanceAndProductivity_ebook.pdf
Size (0xf3683 Bytes) Volume Signature: 0xf861a9de Physical LCN: 0x400 = <0x10400, 0x10401, 0x10402, 0x10403> Index = 0x6
Last-Modified: 04/01/2019 10:13:18 PM TableId: 0x705'0 VirtualClock: 0xf TreeUpdateClock: 0x0
Full built-in help for the salvage command
C:\WINDOWS\system32>refsutil.exe salvage
Microsoft ReFS Salvage [Version 10.0.11070]
Copyright (c) 2015 Microsoft Corp.

Attempts to diagnose heavily damaged ReFS volumes, identify remaining files,
and copy those files to another volume.

ReFS Salvage has a Scan Phase and a Copy Phase. In automatic mode, the Scan
Phase and Copy Phase will run sequentially. In manual mode, each phase can be
run separately. Progress and logs are saved in a working directory to allow
phases to be run separately as well as Scan Phase to be paused and resumed.

Here are the automatic mode Command Line Usages:

Quick Automatic Mode Command Line Usage:
   refsutil salvage -QA <source volume> <working directory> <target directory> <options>

   It will perform a Quick Scan Phase followed by a Copy Phase.
   This mode runs quicker as it assumes some critical structures of the volume
   are not corrupted and so there is no need to scan the entire volume to
   locate them. This also reduces the recovery of stale files/directories/volumes.

Full Automatic Mode Command Line Usage:
   refsutil salvage -FA <source volume> <working directory> <target directory> <options>

   It will perform a Full Scan Phase followed by a Copy Phase.
   This mode may take a long time as it will scan the entire volume for any
   recoverable files/directories/volumes.

Here are the manual mode Command Line Usages:

Diagnose Phase Command Line Usage:
   refsutil salvage -D <source volume> <working directory> <options>

   Attempt to determine if <source volume> is an ReFS volume and determine
   if the volume is mountable. When a volume is not-mountable, reason(s) will
   be determined. This is a standalone phase.

Quick Scan Phase Command Line Usage:
   refsutil salvage -QS <source volume> <working directory> <options>

   Quick Scan <source volume> for any recoverable files.
   This mode runs quicker as it assumes some critical structures of the volume
   are not corrupted and so there is no need to scan the entire volume to
   locate them. This also reduces the recovery of stale files/directories/volumes.
   Discovered files will be logged to "foundfiles.<volume signature>.txt" under
   <working directory>. If the Scan Phase was previously stopped, running with
   the -QS flag again will resume the scan from where it left off.

Full Scan Phase Command Line Usage:
   refsutil salvage -FS <source volume> <working directory> <options>

   Scan entire <source volume> for any recoverable files.
   This mode may take a long time as it will scan the entire volume for any
   recoverable files.
   Discovered files will be logged to "foundfiles.<volume signature>.txt" under
   <working directory>. If the Scan Phase was previously stopped, running with
   the -FS flag again will resume the scan from where it left off.

Copy Phase Command Line Usage:
   refsutil salvage -C <source volume> <working directory> <target directory> <options>

   Copy all files described in "foundfiles.<volume signature>.txt" to
   <target directory>. If Scan Phase is stopped too early,
   "foundfiles.<volume signature>.txt" may not have been written yet and so no file
   will be copied to <target directory>.

Copy Phase with List Command Line Usage:
   refsutil salvage -SL <source volume> <working directory> <target directory> <file list> <options>

   Copy all the files in <file list> from <source volume> to <target directory>.
   The files in <file list> must have first been identified by the Scan Phase
   though the scan need not have been run to completion.
   <file list> can be generated by copying "foundfiles.<volume signature>.txt"
   to a new file, removing lines referencing files that shouldn't be restored,
   and preserving files that should be restored. The PowerShell cmdlet
   Select-String may be helpful in filtering "foundfiles.<volume signature>.txt"
   to only include desired paths, extensions, or file names.

Copy Phase with Interactive Console:
   refsutil salvage -IC <source volume> <working directory> <options>

   Salvage files in an interactive console for advanced users.
   This mode also requires files generated from either of the Scan Phases.

Parameter definitions:
<source volume>         ReFS volume to process. Drive letter in format "L:",
                        or a path to the volume mount point.
<working directory>     Location to store temporary information and logs.
                        It must not be located on <source volume>.
<target directory>      Location where identified files will be copied to.
                        It must not be located on <source volume>.
<options>
   -m                   Recover all possible files including deleted ones.
                        This option will be ignored on refsutil salvage v1.
                        WARNING: Not only this will take longer time to run,
                        it can lead to unexpected result.
   -v                   Verbose mode
   -x                   Force the volume to dismount first if necessary. All
                        opened handles to the volume would then be invalid.

Eg: refsutil salvage -QA R: N:\WORKING N:\DATA -x

 5 comments
 Infrastructure & Hosting

5 comments
Thank You, Thank You, Thank You! had a situation where ReFS died on a backup target server. With utility was able to recover files. for me had to upgrade server to 2019 to be able to use utility but so thankful Microsoft came out with tool. But … MS needs to mark bad sectors or corrupt files and let you know but not completely shutdown the filesystem Looking in logs there was an issue with ONE file! One, smh, had no clue that ReFS would do this. It is having me rethink how we will do our backup targets.
JR
Thanks for details
However, I’ve encountered the following when trying to recover corrupt Mirrored ReFS drive when one drive stopped working. Instread og allowing access to data on the good drive, ReFS reset the drive and now shows up as empty. Have disconnected the bad drive and get the following share access flag issue when running the salvage command. Anyone have any ideas?
C:\WINDOWS\system32>refsutil salvage -FA D: C:\salvage\working C:\salvage\ -v -x
Microsoft ReFS Salvage [Version 10.0.11070]
Copyright (c) 2015 Microsoft Corp.
Local time: 10/7/2019 18:38:54
Option(s) specified: -v -x
Error: Failed to open volume: \\?\Volume{5286ebf0-0db4-4daf-9d8e-b4468d761232}
Error: The process cannot access the file because it is being used by another process.
Error: Failed to open volume.
Error: A file cannot be opened because the share access flags are incompatible.
Error: Initialization failed.
Error: A file cannot be opened because the share access flags are incompatible.
Run time = 0 seconds.
C:\WINDOWS\system32>
Paul Beck
Hi Paul,
Does the Volume ID match with the GUID of your failed volume? Please use the following PowerShell command to quickly determine volume GUIDs:
Get-WmiObject -Namespace root\cimv2 -Class Win32_Volume | fl DriveLetter, DeviceID
Any luck with the other refsutil command-line options, like -D for diagnose or -QS for Quick Scan ?
Best regards,
Roland.
Roland Noordermeer
Thanks for sharing. Had same issue, and had to use refsutil. Not sure if it recovered all the files, but i am never using ReFS again. Not fit for purpose. Whats your position on it? Did you go back to NTFS?
ctgarvey
Yes, for some systems we went back to NTFS indeed. Actually it depends on the usage scenario. We now have the knowledge to judge if the benefits of using ReFS outweigh the risk or not. We didn’t have this knowledge when we started, back then we only saw the benefits…
Roland Noordermeer